UboltAgent Linux Installation Manual
To ensure that users can view cloud server metric data and generate alerts through NUBEX Cloud Monitoring, the official monitoring Agent must be deployed on the target host. The collection of cloud server metric data depends on the monitoring Agent.
Prerequisites
- Installing a new version of UboltAgent will uninstall the historical Python version
uma(if installed). - The command to obtain the UboltAgent installation package must be executed inside an NUBEX host, otherwise it cannot be downloaded properly.
- To ensure monitoring data is reported normally, the TCP protocol port
8088must be allowed inside the cloud host operating system. - If SELinux is in enforcing mode, set
SELINUX=disabledin/etc/selinux/config, and restart the server for it to take effect.
Linux Installation Steps
1. Log in to the Cloud Host as Root
The installation process requires logging in as the root user.
2. Download the Monitoring Component (using wget as an example)
amd64 architecture:
wget http://umon.api.service.ucloud.cn/static/cloudwatch/uboltagent-v1.3.0-linux-amd64.tar.gzarm64 architecture:
wget http://umon.api.service.ucloud.cn/static/cloudwatch/uboltagent-v1.3.0-linux-arm64.tar.gzNote:
Before downloading the monitoring component via the intranet, please log in to the Linux instance and ensure that the cloud server uses the intranet DNS. Otherwise, the download address cannot be resolved.
Ifwgetis not installed, please installwgetfirst or use thecurlcommand to download.
3. Install the Monitoring Component
Extract the Installation Package
amd64 architecture:
tar -zxf uboltagent-v1.3.0-linux-amd64.tar.gzarm64 architecture:
tar -zxf uboltagent-v1.3.0-linux-arm64.tar.gzEnter Installation Directory and Grant Script Permission
cd uboltagent
chmod a+x manage.sh
Run the Installation Script
./manage.sh installIf errors occur during installation, check the log file:
/var/log/uboltagent_install.log
4. Verify Installation Status
Check if the Process Has Started
Run the following command:
ps -ef | grep uboltagentIf the execution result is similar to the screenshot below, it indicates that UboltAgent processes have started successfully, meaning the installation was successful.

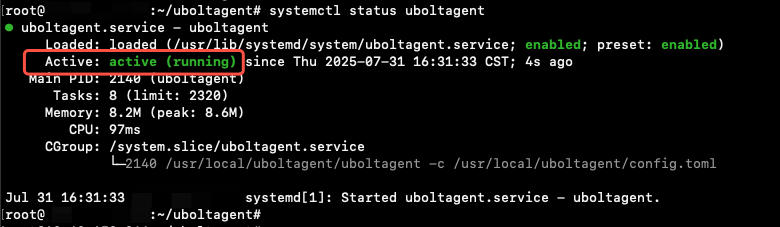
Check Service Status
Run the following command:
service uboltagent status
# or
systemctl status uboltagent
If the execution result is similar to the screenshot below, it indicates that the UboltAgent service is running normally.
Confirm in Cloud Monitoring
Wait about 5 minutes, then go to Cloud Monitoring → CloudWatch → Product Monitoring → Resource Details to check if metric charts are displayed correctly.
Linux Uninstallation
- Run the following command to uninstall:
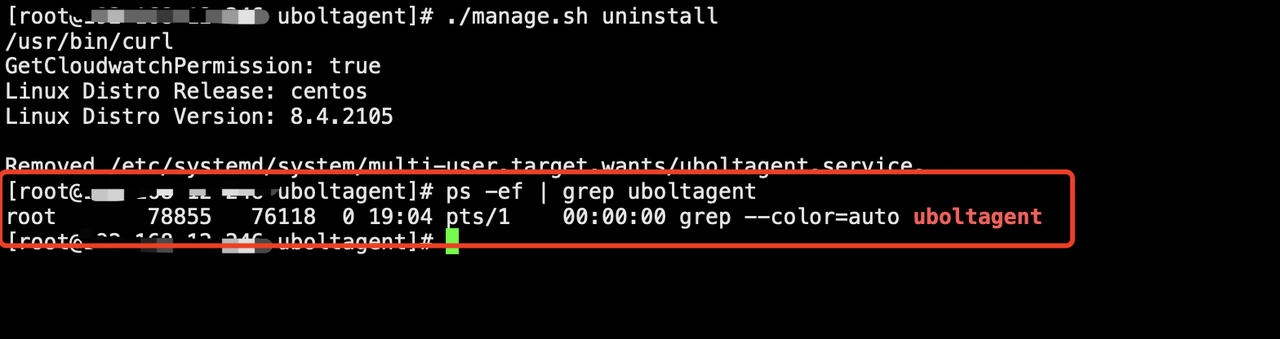
./manage.sh uninstall- Run the following command to confirm if the process has stopped:
ps -ef | grep uboltagentIf no related processes are found, it means the uninstallation was successful.
Notes
- Firewall and Security Groups: Ensure that firewall and security group settings allow the cloud host to access the monitoring server address.
- UboltAgent Version Compatibility: Ensure the downloaded UboltAgent version is compatible with your cloud host operating system.
- Regular Updates: It is recommended to check and update UboltAgent regularly to obtain the latest features and security patches.
- Troubleshooting: If you encounter issues during installation, check the installation log for detailed information or contact technical support.